When your tire loses air for no obvious reason, or your car starts shaking at highway speeds, it’s easy to blame a slow leak or a bent rim. But the real culprit might be hiding where you can’t see it - the bead. This small, tough part of the tire is what seals the tire to the rim. If it fails, you’re not just dealing with a flat. You’re risking a blowout, loss of control, or even a rollover. Bead damage doesn’t always show up on the tread. It’s silent, sneaky, and deadly. Here’s what you need to know - and when to walk away from that tire.
What Is a Tire Bead, and Why Does It Matter?
The tire bead is the thick, reinforced edge of the tire that locks onto the wheel rim. It’s made of steel wires wrapped in rubber, designed to hold under pressure and keep air sealed inside. Without a proper bead seal, your tire can’t hold pressure. Even a tiny gap between the bead and the rim lets air escape slowly - or worse, lets the tire slip off the rim entirely while driving.
This isn’t just a convenience issue. A failed bead seal can cause sudden tire failure at 60 mph. In 2023, the National Highway Traffic Safety Administration reported over 1,200 crashes linked to tire separation, many of which started with bead damage. It’s not a myth. It’s a real, documented danger.
How Bead Damage Happens - The Real Causes
Most people think bead damage comes from hitting potholes. That’s part of it. But the real killers are often the things you do every day without thinking.
- Underinflated tires: Driving on tires with 20% less pressure than recommended causes the sidewall to flex too much. This makes the bead slide back and forth on the rim. Over time, that rubbing wears through the rubber and cracks the steel wires inside. You won’t feel it until the tire starts losing air - and by then, it’s too late.
- Wrong rim size: Putting a 225-width tire on a 6-inch rim instead of the recommended 7.5 inches puts extreme pressure on the bead. The tire can’t seat properly, and the bead wires bend unnaturally. This is common with aftermarket wheels or used tires bought without checking specs.
- Improper mounting: If a shop doesn’t use lubricant when installing a tire, the bead can tear during inflation. Or if they use metal tools to pry the tire on, they can nick the bead. One wrong move, and the seal is ruined.
- Corrosion between rim and bead: Salt from winter roads, moisture, and dirt build up over time. This rust or grime prevents the bead from seating tightly. Even if the tire looks fine, air leaks out slowly. You keep topping it off - until one day, it blows out.
- Overloading: Hauling more than your car’s max load rating pushes the sidewall hard against the rim edge. That constant pressure crushes the bead rubber, leading to cracks and separation.
- Hard braking: Especially on heavy vehicles or trucks, sudden stops generate heat at the bead. Rubber doesn’t handle heat well. Repeated hard stops can scorch the bead, weakening it until it fails.
How to Spot Bead Damage - 7 Warning Signs
You don’t need a mechanic to spot early bead damage. Just know what to look for.
- Exposed steel wires: Look closely at the inner edge of the tire where it meets the rim. If you see shiny metal poking through the rubber, that’s a dead giveaway. This is not repairable.
- Burn marks or scorching: Dark, charred patches along the bead area mean excessive heat built up - usually from hard braking or dragging brakes. This damage is permanent.
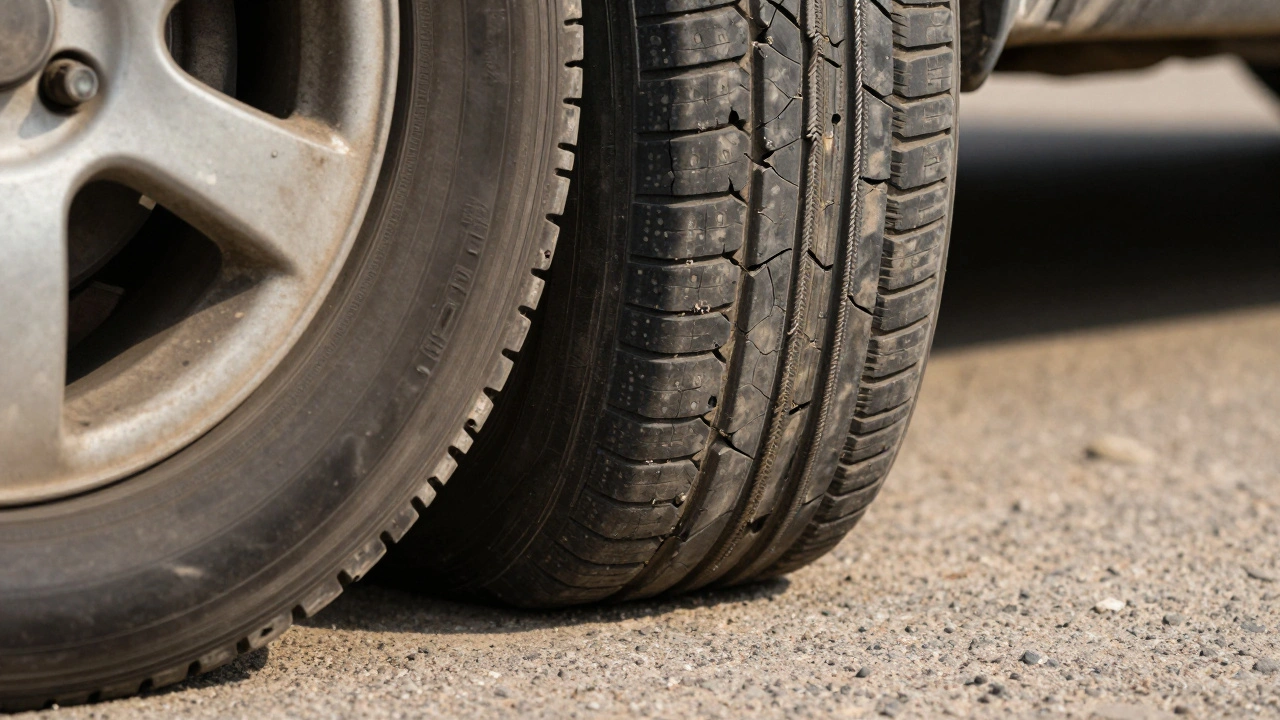
- Cracks along the bead: Fine lines or splits in the rubber near the rim. These aren’t just surface cracks. They mean the internal steel cords are starting to break.
- Frequent air loss: If you’re refilling your tires every 2-3 weeks with no punctures, the bead isn’t sealing. Dirt, corrosion, or warping are likely the cause.
- Tire wobbling or vibration: Especially at 50+ mph. If the bead isn’t locked in, the tire rocks on the rim. That’s not a balance issue - it’s a structural failure.
- Uneven shoulder wear: If one side of the tread wears faster than the other, the tire might be shifting on the rim due to a loose bead.
- Visible separation: If you can see a gap between the tire and the rim when the car is off the ground, that’s not normal. The bead has lost its grip.

When You Must Replace the Tire - No Exceptions
Some tire shops will try to patch or plug a bead-damaged tire. Don’t let them. It’s not safe.
Here’s the rule: If the bead’s steel wires are exposed, bent, broken, or burned - replace the tire immediately. There is no repair that restores the structural integrity of a damaged bead.
Even if the tire looks fine on the outside, if it won’t hold pressure after being properly seated and inflated, it’s done. You can’t fix a seal that’s been compromised at the molecular level. The rubber has lost its elasticity. The wires have lost their tension.
A 2024 study by the Tire Industry Association found that 89% of bead damage repairs attempted by non-professional shops failed within 90 days. Most of those failures led to blowouts.
Don’t gamble. If you’ve hit a curb hard, driven on underinflated tires for weeks, or noticed any of the signs above - replace it. A new tire costs $80-$150. A rollover costs lives.
What About Reusing the Rim?
Just because the tire is damaged doesn’t mean the rim is fine. Corrosion, bends, or debris on the rim can cause the new tire’s bead to fail too.
Before installing a new tire:
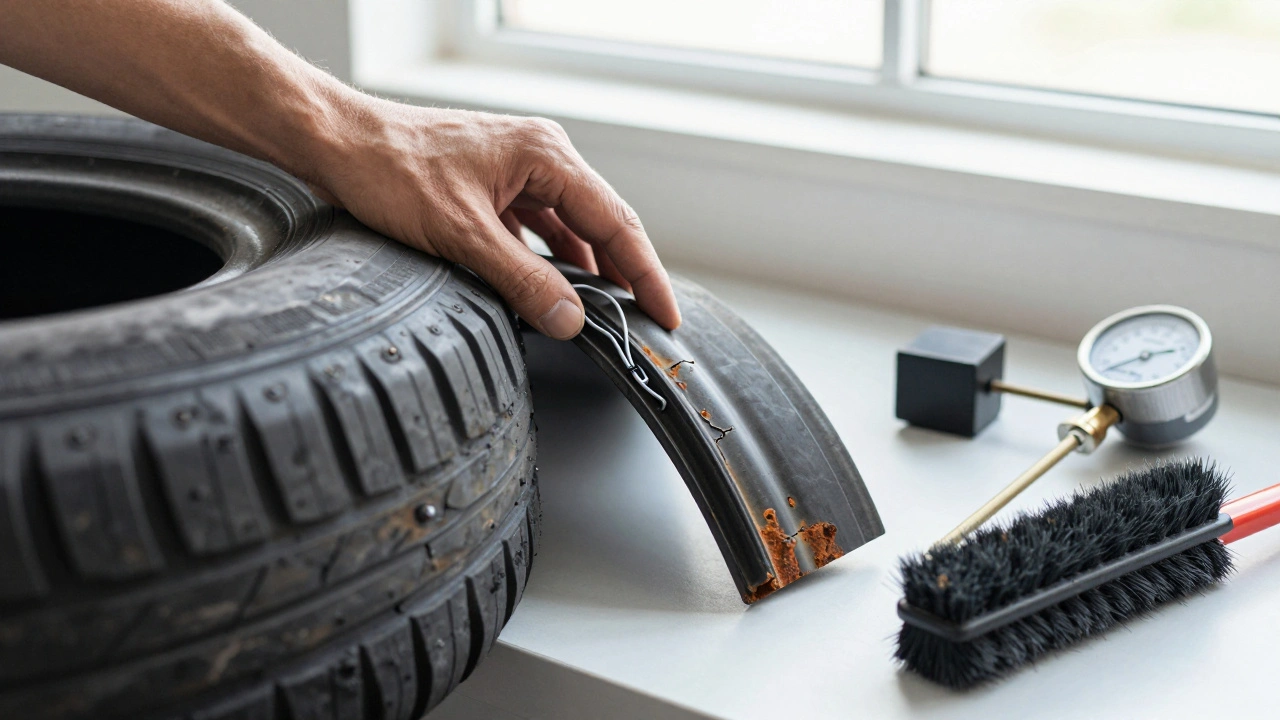
- Remove the old tire and clean the rim thoroughly with a wire brush.
- Check for dents, cracks, or rust spots - especially along the bead seat area.
- If the rim is bent or corroded, replace it. A damaged rim will ruin a new tire within weeks.
Many shops will recondition rims for $20-$40. It’s worth it. Don’t put a new tire on a dirty, rusty rim. You’re just setting up for another failure.
How to Prevent Bead Damage Before It Starts
Prevention is simple. It just takes a few minutes a month.
- Check tire pressure monthly. Use a quality gauge. Don’t trust the dashboard light. Set it to the number on the driver’s door jamb - not the max on the tire sidewall.
- Match your tires to your rims. If you’re buying used tires, check the width and rim size compatibility. A 215 tire on a 6-inch rim? No. A 245 on a 9-inch rim? Maybe. Always verify.
- Avoid curbs and potholes. If you can’t steer around them, slow down. A 10 mph impact is far less damaging than a 30 mph one.
- Don’t overload. Know your vehicle’s max load. Towing? Check your owner’s manual. Exceeding it stresses every part of the tire - especially the bead.
- Use professional tire services. Ask if they use lubricant and proper tools. If they use screwdrivers or pliers to mount tires, find a new shop.
- Inspect tires during oil changes. Run your fingers along the bead area. Look for cracks, discoloration, or debris.
What Happens If You Ignore It?
Ignoring bead damage isn’t just risky - it’s reckless.
A tire with a compromised bead can fail without warning. No hissing. No warning light. Just sudden loss of control. At highway speeds, that’s enough to send a car into a spin. In rain or snow, it’s often fatal.
Insurance companies know this. Many deny claims if they find bead damage was ignored and led to an accident. You’re not just risking your life - you’re risking your coverage.
And here’s the truth: bead damage doesn’t get better. It only gets worse. Every mile you drive on it weakens the structure further. What starts as a slow leak becomes a total failure. What starts as a vibration becomes a crash.
You don’t need to be a mechanic to know this: if your tire won’t hold air, and you can’t find a puncture - replace it. No exceptions. No second chances.