Imagine pressing down on your brake pedal and feeling it sink toward the floor with a soft, mushy resistance. That "spongy" sensation is not just annoying; it is a serious safety warning. It usually means air has entered your hydraulic brake system, which relies on incompressible fluid to transfer force from your foot to the brake pads. Unlike liquid, air compresses under pressure, absorbing energy that should be stopping your wheels. If you ignore this issue, your stopping distances increase significantly, potentially leading to accidents. The good news? You can often fix this yourself by performing a procedure known as brake bleeding.
Why Air Gets Into Your Brake Lines
Your car's braking system is a sealed loop of metal lines and rubber hoses filled with specialized fluid. Over time, seals wear out, or components like calipers and wheel cylinders are replaced during repairs. Every time you open this system, you invite air in. Even if you haven't done any repairs, old brake fluid absorbs moisture from the atmosphere because it is hygroscopic. When heated during driving, this trapped water boils into steam-essentially creating air bubbles inside the lines.
If your pedal feels firm one day and spongy the next, check for leaks first. A leak allows fluid to escape and air to enter. If there are no visible leaks but the pedal remains soft, air is likely trapped high up in the system, near the wheel calipers. This is where manual intervention helps restore full hydraulic pressure.
Gathering the Right Tools
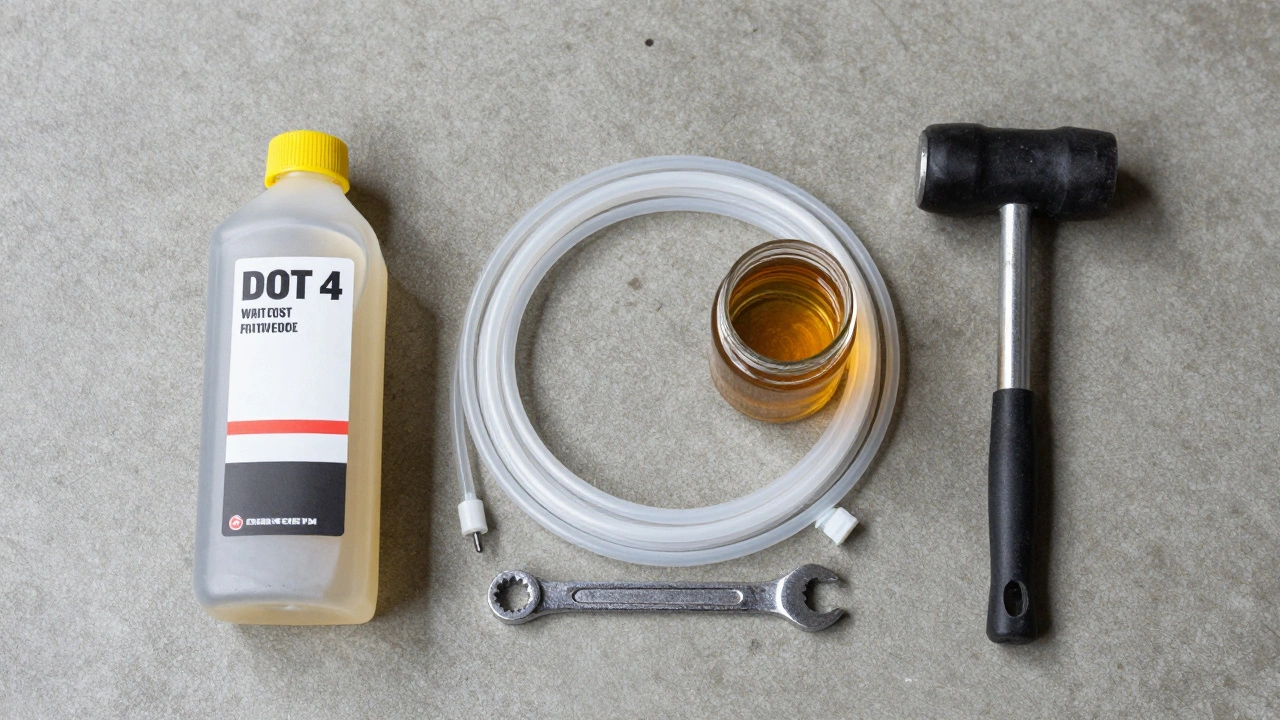
You do not need a professional shop to bleed brakes, but you do need the right gear. Using improper tools can damage delicate bleeder screws or contaminate the fluid. Here is what you need:
- Fresh Brake Fluid: Check your owner’s manual for the correct specification. Most modern cars use DOT 3 or DOT 4 brake fluid. Never mix different types unless specified. DOT 5 is silicone-based and incompatible with glycol-based fluids (DOT 3/4/5.1).
- Clear Vinyl Tubing: Approximately 3 feet long with an inner diameter of 3/16 inch. Clear tubing lets you see air bubbles exiting the line.
- Collection Container: A clean, small jar or bottle to catch the used fluid.
- Box-End Wrench: Usually 8mm or 10mm, depending on your vehicle. Avoid using pliers, as they can strip the bleeder screw heads.
- Rubber Mallet: Useful for tapping calipers to dislodge stubborn air pockets.
- Jack and Jack Stands: To safely lift and secure the vehicle.
Note: For vehicles with Anti-Lock Braking Systems (ABS), especially those manufactured after 2012, you may need a scan tool to cycle the ABS pump valves. Standard bleeding might not clear air trapped within the ABS hydraulic control unit.
The Critical Bleeding Sequence
Order matters. You must bleed the brakes in a specific sequence to prevent air from getting pushed back into parts of the system you have already cleared. The general rule is to start with the wheel farthest from the master cylinder and work your way to the closest.
For most American-made vehicles with front-engine layouts, the standard sequence is:
- Right Rear (Passenger side)
- Left Rear (Driver side)
- Right Front (Passenger side)
- Left Front (Driver side)
European or rear-wheel-drive vehicles may differ. Always consult your repair manual to confirm the exact order for your model. Skipping this step is the most common cause of incomplete bleeding, leaving residual air that causes inconsistent braking.
Step-by-Step Manual Bleeding Process
This method requires two people: one to operate the brake pedal and another to manage the bleeder valve. If you are working alone, consider using a vacuum bleeder kit instead, which I will cover later.
Step 1: Prepare the Vehicle
Park on a level surface, engage the parking brake, and place wheel chocks behind the tires you won't be lifting. Lift the car using a jack and secure it with jack stands. Remove the wheel to access the brake caliper or drum assembly. Locate the bleeder screw, usually found on the top or side of the caliper.
Step 2: Connect the Tubing
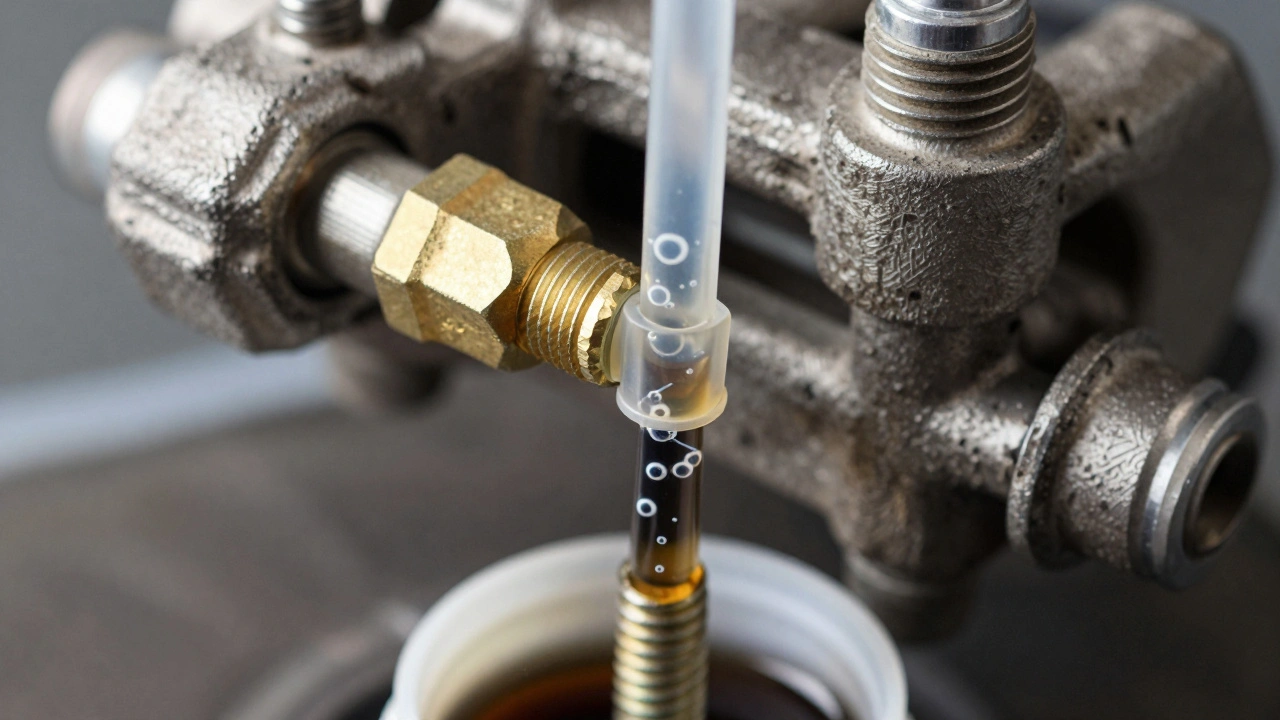
Attach one end of the clear vinyl tubing to the bleeder screw and submerge the other end in the collection container filled halfway with fresh brake fluid. Keeping the tube submerged prevents air from being sucked back into the line when you close the valve.
Step 3: The Pump and Hold
Instruct your helper to press the brake pedal firmly to the floor and hold it there. While they hold the pedal, slowly loosen the bleeder screw about a quarter turn. You will see fluid and possibly air bubbles flow through the tube into the jar. Tighten the screw immediately before your helper releases the pedal. This timing is crucial; releasing the pedal before closing the valve sucks air back in.
Step 4: Repeat Until Clear
Repeat this process until the fluid flows out completely clear, without any bubbles. Keep the master cylinder reservoir topped off with fresh fluid throughout the entire process. Never let the reservoir run dry, or you will introduce more air into the main system.
Step 5: Move to the Next Wheel
Once the first wheel is complete, move to the next wheel in the sequence. Repeat the steps for all four wheels.
Alternative Methods: Vacuum and Pressure Bleeding
If you don't have a helper, or want a faster, more thorough job, mechanical aids are excellent options.
Vacuum Bleeding
A handheld vacuum bleeder attaches to the bleeder screw and pulls fluid out, drawing air with it. This allows one person to do the job. However, be careful not to pull too hard, as this can damage internal seals or suck air back in if the seal isn't perfect. Look for models with a built-in filter to prevent debris from entering the brake line.
Pressure Bleeding
This method involves attaching a pressurized can of brake fluid to the master cylinder reservoir. The constant pressure forces fluid out through the bleeder screws automatically. This is the fastest method and ensures consistent flow, making it ideal for flushing the entire system. Many professional shops use this technique because it minimizes the risk of introducing air during the process.
Special Considerations for ABS Vehicles
Modern cars equipped with Anti-Lock Braking System (ABS) add complexity. The ABS module contains a hydraulic control unit with small valves that can trap air. Standard bleeding clears the main lines, but air may remain in the ABS pump.
If your pedal still feels spongy after bleeding all four wheels correctly, the air is likely in the ABS module. On many vehicles, you can resolve this by driving the car at speeds above 15 mph while making several gentle stops to activate the ABS naturally. This cycles the valves and pushes air out.
However, for severe cases or newer models (particularly Chrysler/Dodge products post-2012), you may need a diagnostic scan tool to perform a "bleed mode" function. This electronically opens and closes the ABS valves to purge trapped air. Attempting to manually bleed an ABS module without proper tools often results in failure and requires a visit to a dealership or specialized mechanic.
Safety Tips and Common Mistakes
Brake fluid is corrosive and toxic. Wear safety glasses and gloves. If fluid spills on painted surfaces, wipe it off immediately to avoid damaging the finish. Never reuse old brake fluid; it contains contaminants and absorbed moisture that compromise braking performance.
A common mistake is ignoring the condition of the bleeder screws. If a screw strips or breaks, you will need to drill it out and install a new one-a much more difficult task. Use a proper box-end wrench and apply penetrating oil if the screw seems stuck. Do not force it with pliers.
Another frequent error is neglecting to bench-bleed the master cylinder if you recently replaced it. A new master cylinder often contains air inside its own chambers. Bench bleeding removes this air before installation, saving you hours of frustration later.
When to Seek Professional Help
While bleeding brakes is a manageable DIY task, some situations require expert attention. If you have tried bleeding the brakes multiple times and the pedal remains spongy, you may have a failing master cylinder, a major leak, or complex ABS issues. Additionally, if you are uncomfortable lifting the vehicle or handling hazardous fluids, take it to a trusted mechanic. The cost of a professional brake service typically ranges from $85 to $150, ensuring the job is done safely and correctly.
How often should I bleed my brakes?
Most manufacturers recommend replacing brake fluid every two years or 30,000 miles, whichever comes first. Since fluid absorbs moisture over time, regular replacement prevents boiling and corrosion. Bleeding is necessary whenever you replace brake components or notice a spongy pedal.
Can I mix DOT 3 and DOT 4 brake fluid?
Yes, DOT 3 and DOT 4 are compatible because both are glycol-based. However, always use the type specified by your vehicle manufacturer. DOT 5 is silicone-based and should never be mixed with DOT 3 or 4, as it can cause severe system damage.
What does it mean if my brake pedal goes to the floor?
A pedal that sinks to the floor usually indicates a significant air presence, a fluid leak, or a failed master cylinder. Stop driving immediately and inspect for leaks. If no leaks are found, the master cylinder may need replacement.
Do I need a scan tool to bleed brakes on a 2020+ car?
Not always. For standard maintenance, manual or vacuum bleeding works fine. However, if you have replaced ABS components or the pedal remains spongy after bleeding, a scan tool may be required to cycle the ABS hydraulic control unit valves.
Is it safe to bleed brakes alone?
Yes, if you use a vacuum bleeder kit or a one-person brake bleeder clamp. These tools allow you to control the flow without needing someone to pump the pedal. Ensure you follow the instructions carefully to avoid sucking air back into the system.