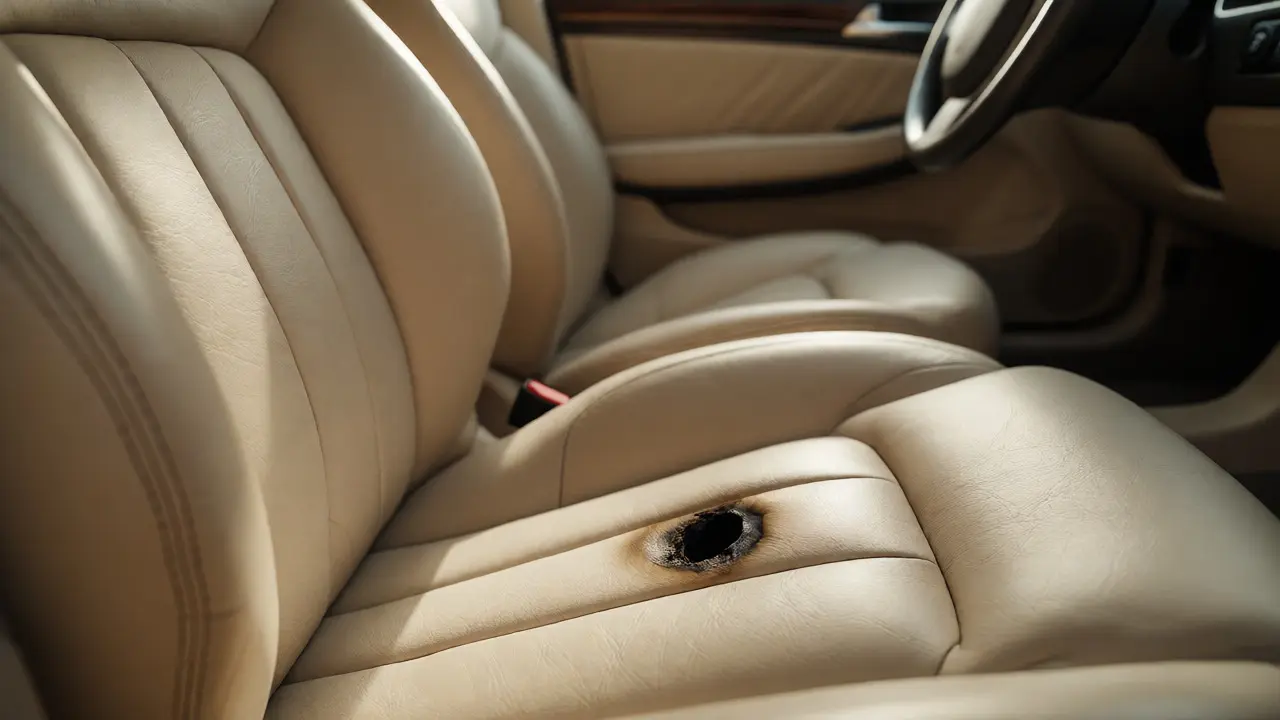
You’re driving along, music up, windows down, and you flick your cigarette out the window. Or maybe you just dropped it on the passenger seat while reaching for a napkin. Either way, that tiny ember did its job. Now there’s a black, charred hole staring back at you from your otherwise pristine car upholstery. It looks worse than it is, but ignoring it means the fabric will unravel or the leather will crack further.
Here’s the good news: you don’t need to replace the entire seat cover, which can cost hundreds of dollars. With a little patience and the right kit, you can make that burn disappear almost completely. This guide walks you through exactly how to fix a cigarette burn in both leather and cloth seats, step-by-step, so you can get your interior looking new again without breaking the bank.
Assessing the Damage Before You Start
Not all burns are created equal. Before you buy anything, look closely at what you’re dealing with. Is it just the surface layer? Did it go through the top coating into the backing material? Or did it scorch the foam underneath?
For leather, burns usually sit on the surface or penetrate slightly into the grain. If you can feel a depression but no hole goes all the way through, you’re in luck. For cloth or fabric, the risk is higher because fibers melt and pull apart. Check if the weave is still intact around the edges. If the hole is larger than a dime, you’ll need filler. If it’s smaller, a color match might be enough.
- Superficial Scorch: Just discoloration. Clean and condition.
- Minor Hole (Leather): Surface penetration. Needs filler and dye.
- Deep Burn (Cloth): Fibers melted away. Needs patching and weaving.
- Foam Damage: You can see yellowed sponge inside. Requires structural repair first.
Gathering Your Toolkit
You don’t need professional-grade equipment, but you do need specific materials. A standard automotive upholstery repair kit costs between $15 and $40 online. These kits typically include a heating tool, colored wax sticks, and liquid leather compound.
If you’re fixing cloth, you’ll need different supplies. Grab some matching thread, a needle, fabric glue, and possibly a small piece of donor fabric from under the seat or inside the trunk lining. For leather, ensure your kit has a color mixer or multiple shades, as factory colors rarely match perfectly out of the box.
| Item | Purpose | Estimated Cost |
|---|---|---|
| Upholstery Repair Kit | Filler, heat tool, base colors | $20 - $40 |
| Isopropyl Alcohol | Cleaning and degreasing | $3 |
| Scissors & Tweezers | Trimming loose fibers | Home |
| Fabric Glue | Securing cloth patches | $5 |
| Microfiber Cloths | Buffing and cleaning | $5 |
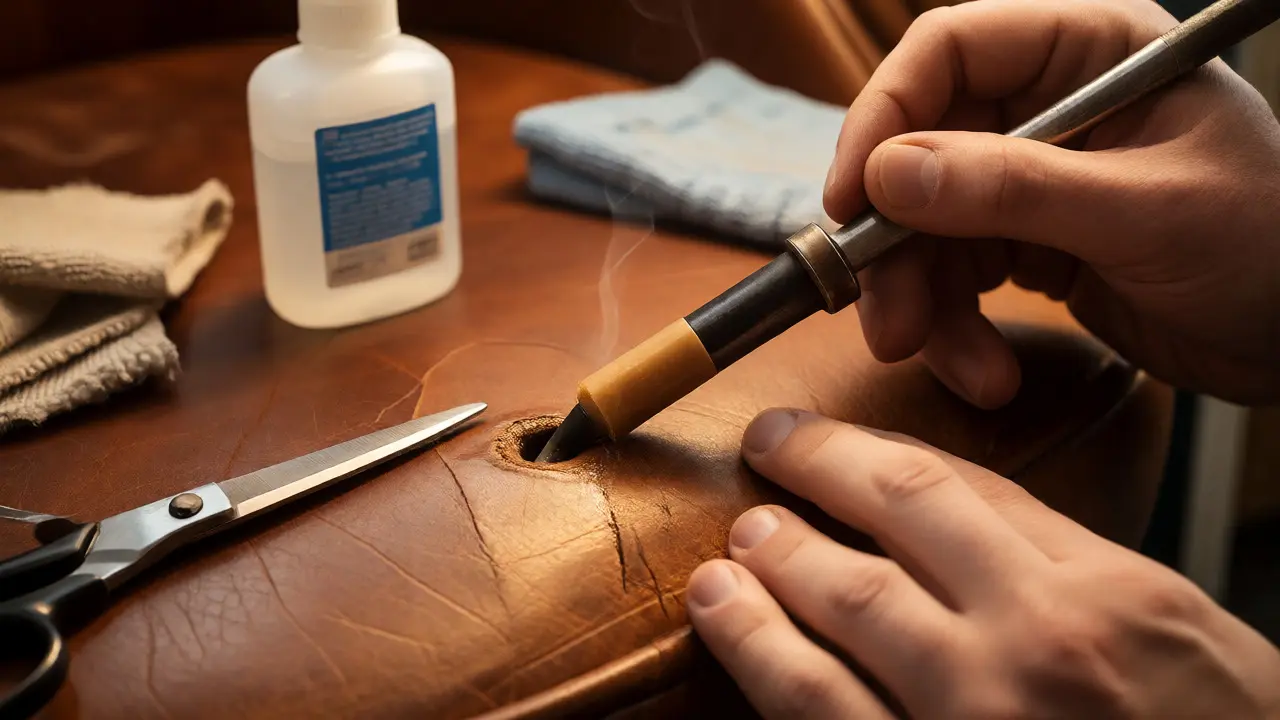
Fixing Leather Seats: The Wax Fill Method
Leather is forgiving because it’s non-porous on the surface. The goal here is to fill the void and blend the color. Start by trimming any burnt, ragged edges with sharp scissors. Be careful not to enlarge the hole. Next, clean the area thoroughly with isopropyl alcohol to remove oils and dirt. Let it dry completely.
Select a wax stick from your kit that matches your seat color. If you have a tan seat, mix a bit of brown and cream. Melt the wax using the heated tip of your tool directly into the hole. Overfill it slightly. The wax will shrink as it cools. Once solid, use the flat side of the heated tool to scrape away excess wax until it’s level with the surrounding leather.
Now comes the tricky part: texture. Real leather has grain. To mimic this, gently press a piece of textured paper or a grain imprint sheet onto the warm wax before it fully hardens. Finally, apply a leather conditioner over the whole seat to unify the sheen. If the color is off, use a leather marker or dye pen to tweak the shade.
Repairing Cloth Seats: Patch and Weave
Cloth repairs are more about structure than chemistry. If the burn went through the top layer but not the backing, you can often hide it by pulling nearby fibers together. Use tweezers to lift the surrounding threads toward the center of the burn. Apply a tiny drop of fabric glue to hold them in place. This works best for very small holes.
For larger holes, you need a patch. Cut a small square of matching fabric (or neutral backing material) slightly larger than the hole. Apply fabric glue to the edges of the hole and insert the patch behind the fabric, like an iron-on patch from the backside. Press firmly. Once dry, use a needle to stitch the edges of the hole down to the patch, following the existing weave pattern. Don’t worry about perfect stitches; the goal is tension, not aesthetics at this stage.
To finish, tease the fibers of the patch and the surrounding fabric with a stiff brush or toothbrush. This blends the textures so the eye doesn’t catch the edge of the repair. If you have a lint roller, run it over the area to remove loose fuzz.

Common Pitfalls to Avoid
The biggest mistake people make is rushing the drying process. Filler needs time to cure. If you buff too early, you’ll smear the color and ruin the texture. Another error is using too much heat on synthetic fabrics. Polyester melts easily. Keep your heat source moving and test on a hidden spot first.
Also, don’t ignore the smell. Burnt tobacco leaves a lingering odor. After repairing the visual damage, sprinkle baking soda on the seat, let it sit for an hour, and vacuum it up. This neutralizes the smoke smell better than air fresheners.
When to Call a Pro
DIY is great for spots smaller than a quarter. But if you have multiple burns across the seat, or if the damage is on a high-wear area like the driver’s thigh bolster, a professional reupholsterer might offer a better long-term result. They can replace panels or use industrial-grade dyes that last longer. However, for a single accidental drop, your home toolkit is more than sufficient.
Restoring your car interior isn’t just about vanity. A well-maintained cabin signals care and attention to detail, whether you’re selling the car later or just enjoying the daily commute. With these steps, you turn a momentary lapse in judgment into a seamless fix.
Can I fix a cigarette burn without a repair kit?
Yes, for minor leather burns, you can use clear nail polish or super glue mixed with a tiny bit of pigment. However, these methods lack the flexibility of proper automotive compounds and may crack over time. For cloth, you can use fabric glue and a matching thread, but results vary based on your sewing skill.
Will the repaired spot be visible after drying?
It should be barely noticeable if done correctly. The key is blending the color and texture. On leather, matching the grain pattern hides the repair. On cloth, teasing the fibers makes the patch indistinguishable from the rest of the seat under normal lighting conditions.
How long does the repair take?
Active work takes about 30-45 minutes per burn. However, allow 24 hours for full curing before sitting heavily on the seat. Rushing this step leads to smudging or peeling.
Does this affect my car's resale value?
A clean repair preserves value. An obvious, poorly executed DIY fix can lower it. If you plan to sell soon, ensure the repair is invisible. Otherwise, buyers appreciate a maintained interior, even with minor imperfections.
Can I prevent future burns?
Absolutely. Use ashtrays, avoid holding lit cigarettes near seats, and consider installing seat covers if you’re prone to accidents. Regular conditioning also helps leather resist minor scuffs and heat damage.