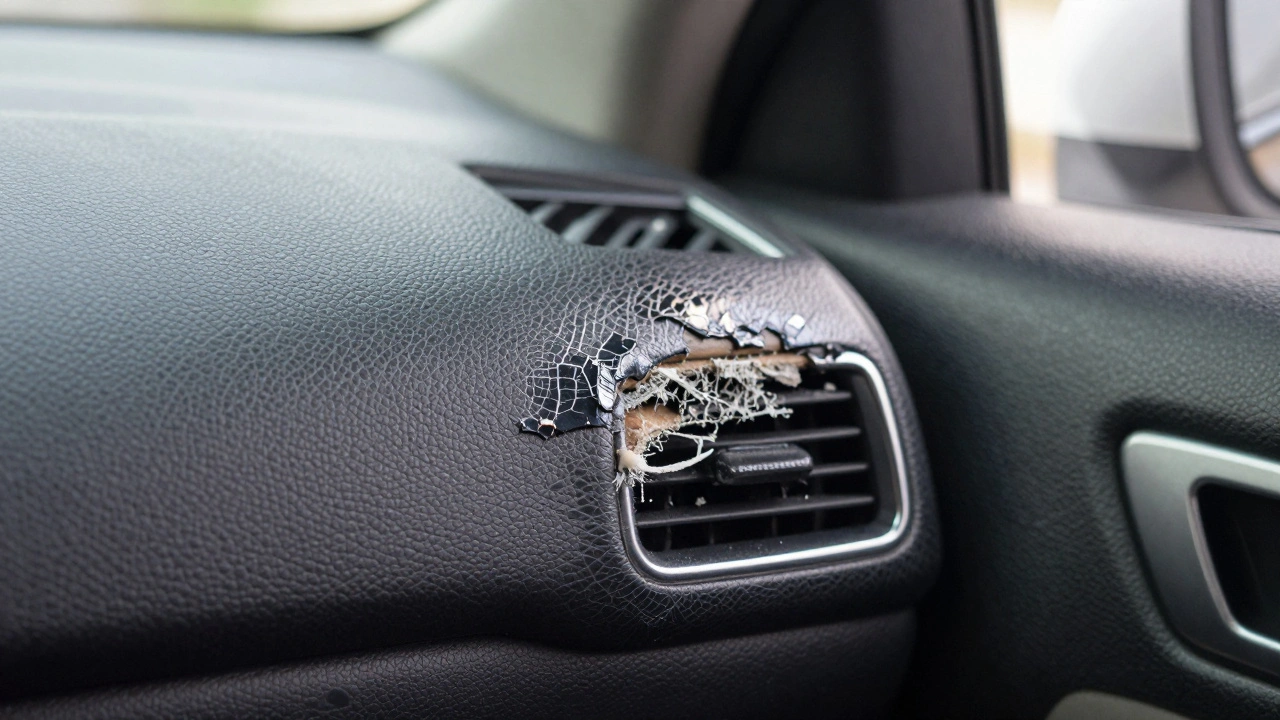
That crack in your driver’s side door armrest is staring at you every time you get into the car. It starts small-a tiny split in the vinyl or a patch of shiny leather where your elbow has rubbed away the grain for years. But before you know it, the foam underneath collapses, the plastic shell cracks, and the whole thing looks like it belongs in a junkyard, not your daily driver. You’ve probably looked at the price tag for a brand-new OEM door panel from the dealership and winced. For modern luxury cars, that number often hits several hundred dollars just for one side. That’s why rebuilding the armrest yourself-or hiring a specialist-is becoming a smarter move than replacing the entire assembly.
Rebuilding isn’t just slapping a cheap slip-on cover over the damage. It’s about restoring the structure, comfort, and look of the part. Whether you’re dealing with sun-bleached vinyl on an older sedan or a torn seam on a high-end SUV, fixing the armrest saves money, reduces waste, and can actually make your car feel newer than when you bought it. Here is how to tackle the problem, from quick DIY hacks to professional-grade restorations.
Understanding What Actually Breaks
To fix the armrest properly, you need to understand what you are fighting against. Most original equipment manufacturer (OEM) door panels are built like sandwiches. You have a hard structural base-usually injection-molded ABS plastic or polypropylene-that provides the shape. On top of that sits a layer of foam padding for comfort. Finally, there is the decorative surface: vinyl, leather, or fabric, attached with glue, heat stakes, or mechanical fasteners.
Wear happens in three distinct layers:
- The Surface Layer: This is what you see first. Vinyl becomes brittle and cracks due to UV exposure and repeated flexing. Leather loses its protective coating, turning shiny and smooth in high-contact zones. Seams split where the stitching was stressed.
- The Comfort Layer: Over time, the foam compresses permanently. Your armrest feels flat and hard because the material has lost its ability to spring back. This is common in cars that have seen heavy use over five to ten years.
- The Structural Base: The plastic shell can crack if something heavy is leaned on it, or mounting tabs can snap off during removal or aggressive cleaning. If the base is broken, no amount of new leather will help until the skeleton is fixed.
Identifying which layer is failing dictates your repair strategy. A surface crack needs filler and dye. A flat spot needs new foam. A broken tab needs welding or epoxy.
The DIY Approach: Quick Fixes and Budget Repairs
If you want to spend less than $50 and get the job done this weekend, DIY is your route. There are two main paths here: cosmetic repair kits and functional upgrades.
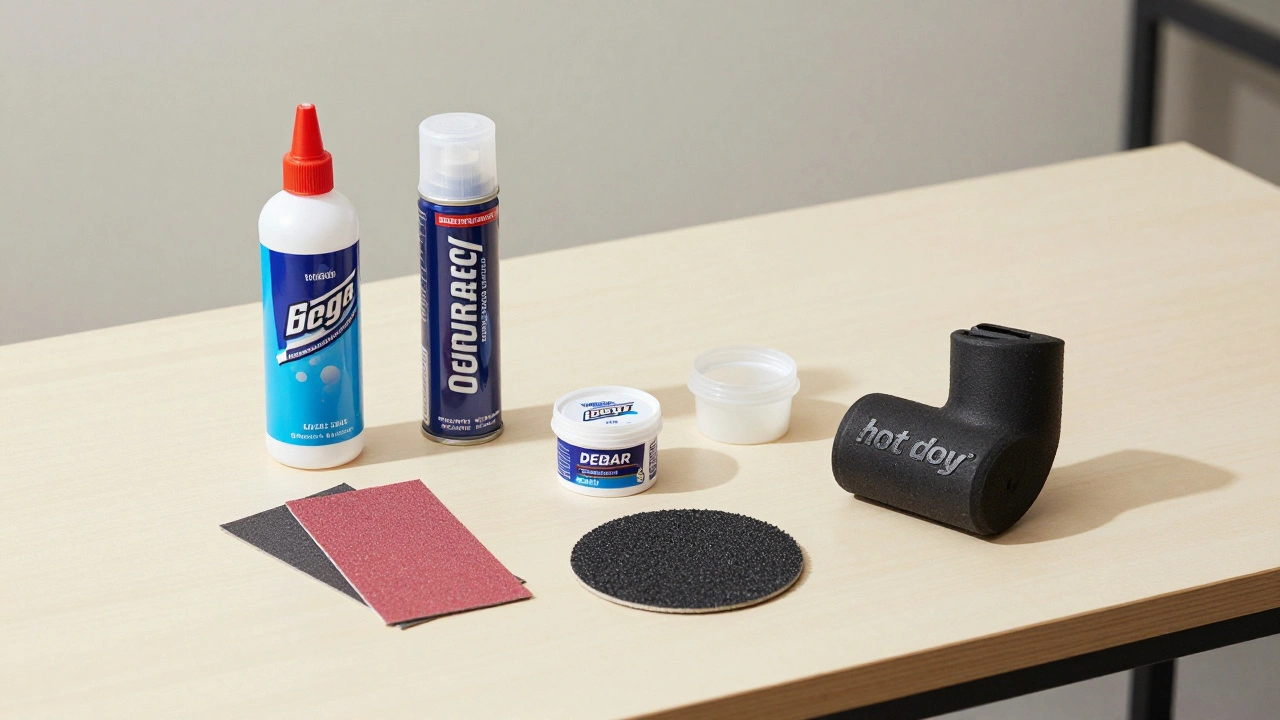
Cosmetic Repair Kits For small tears or cracks in vinyl, repair kits are surprisingly effective. These kits usually contain a flexible filler, color-matched dyes, and a grain texture pad. The process involves cleaning the area thoroughly, sanding it lightly, applying the filler to level out the crack, pressing the grain pad into the semi-cured filler to mimic the factory texture, and then coloring it to match. This works well for cracks up to a few centimeters long. However, large tears near edges or seams often pull apart again under stress, making them better candidates for full reupholstery.
Functional Upgrades (The "Hot Dog" Method) Some enthusiasts prefer function over form. If your foam is collapsed, you don’t necessarily need to sew a new cover. A popular hack involves gluing a cylindrical cushion-like a pet toy shaped like a hot dog or a dedicated aftermarket elbow pad-to the existing armrest. To do this right, surface preparation is critical. You must clean the old vinyl with a degreaser (like Workhorse cleaner) and wipe it down with alcohol or MAF sensor cleaner to remove all oils and residues. Then, use a flexible adhesive like silicone gasket maker or Shoe Goo to bond the new cushion. Let it cure for a few hours. It might not look OEM, but it restores comfort instantly.
| Method | Cost Estimate | Durability | Best For |
|---|---|---|---|
| Vinyl Repair Kit | $10 - $30 | Medium (1-3 years) | Small cracks, surface discoloration |
| Slip-On Covers | $15 - $40 | Low (6-12 months) | Hiding damage quickly, rental cars |
| Add-On Cushions | $10 - $30 | High (if glued well) | Collapsed foam, comfort seekers |
| Plastic Welding/Epoxy | $20 - $50 | Very High | Broken structural tabs or shells |
Structural Repairs: Fixing the Plastic Shell
If the underlying plastic is cracked, you cannot skip this step. Covering a crack with new leather is like putting a bandage on a broken bone-it will fail. The key principle here is flexibility. Automotive interiors flex with temperature changes and vibration. If you use a rigid body filler, it will crack again within weeks.
Use a flexible two-part urethane repair compound or a specialized plastic welding kit. For larger cracks, some professionals reinforce the inside of the shell with a thin aluminum or plastic backing plate bonded with structural epoxy. This adds strength without adding much weight. If a mounting tab has snapped off, plastic welding is the gold standard. You melt the plastic together using a heated tool, often adding filler rod made of the same type of plastic (ABS or PP) to create a strong bond. Once welded, sand it flush. Now the substrate is ready for new padding.
Professional Reupholstering: The Permanent Fix
If you want your car to look like it just rolled off the lot, professional reupholstering is the way to go. Shops like Best Way Auto Upholstery in Los Angeles or Albo Restoration in Chicago specialize in this. They don’t just patch; they rebuild.
The professional process typically involves:
- Removal: Taking the entire door panel off the car. This requires removing screws, clips, and carefully disconnecting any wiring or side-airbag modules. Safety warning: Always disconnect the battery and wait 10-20 minutes before touching airbag connectors.
- Pattern Making: Tracing the old cover onto new material, adding extra allowance for seams and stretching.
- Sewing: Using an industrial walking-foot sewing machine to stitch the new cover. This ensures the seams can handle tension without popping.
- Adhesion: Applying high-temperature spray contact adhesive (like 3M 080xx series) to both the foam and the back of the new cover. The cover is stretched tightly over the contours while the glue is tacky.
- Reassembly: Putting the panel back on with new clips if the old ones broke.
This service costs more than DIY-often $150 to $400 per door depending on complexity-but it comes with warranties (often one year) and uses materials that match OEM grain and color precisely. It also allows you to upgrade, such as switching from vinyl to real leather.

When to Replace vs. When to Rebuild
Not every armrest is worth saving. Here is a simple decision tree:
- Rebuild if: The plastic shell is intact, the tear is manageable, or you want to preserve the original character of an older car. Rebuilding is also the eco-friendly choice, keeping plastic and foam out of landfills.
- Replace if: The structural base is shattered beyond repair, the cost of labor/materials exceeds 70% of a new OEM panel, or the panel contains integrated electronics (like touch controls or ambient lighting) that are damaged. In these cases, buying a used OEM panel from a salvage yard might be cheaper and faster than rebuilding.
For newer vehicles with complex multi-function armrests, check your owner’s manual or online forums (like Bimmerpost or VWVortex) to see if the armrest is sold as a separate sub-assembly. Sometimes, you can buy just the armrest module rather than the whole door panel, which simplifies the repair significantly.
Tips for Long-Lasting Results
Whether you DIY or hire a pro, these tips ensure your repair lasts:
- Cleanliness is Key: Adhesives fail on dirty surfaces. Use a dedicated automotive degreaser and isopropyl alcohol before bonding anything.
- Test Solvents: Before using strong cleaners or dyes, test them on a hidden area of the door panel to ensure they don’t cause discoloration or melting.
- Match Flexibility: Always use flexible adhesives and fillers for interior trim. Rigid materials will crack under thermal expansion and contraction.
- Protect from Sun: Apply a UV protectant to repaired vinyl or leather areas to prevent premature fading and cracking.
Fixing your door armrest doesn’t have to be a headache. With the right approach, you can restore comfort and style to your car’s interior without breaking the bank. Just remember: prep work is 90% of the battle. Take your time, choose the right materials, and your armrest will thank you for miles to come.
How much does it cost to professionally rebuild a door armrest?
Professional rebuilding typically costs between $150 and $400 per door panel, depending on the complexity of the design, the material used (vinyl vs. leather), and the shop's location. This is often cheaper than buying a new OEM door panel from a dealership, which can exceed $500 for luxury brands.
Can I repair a cracked plastic door armrest myself?
Yes, you can repair cracked plastic using plastic welding kits or flexible epoxy compounds. Avoid rigid body fillers as they will crack again due to the flexing of the door. For best results, reinforce the repair from the inside with a backing plate if the crack is large.
What is the best adhesive for attaching a new cushion to a door armrest?
For DIY additions like elbow pads, flexible adhesives like silicone gasket maker or Shoe Goo work well because they remain pliable after curing. For professional reupholstery, high-temperature spray contact adhesives (such as 3M Super 77 or similar automotive grades) are the industry standard for bonding leather or vinyl to foam.
Is it safe to remove my door panel if it has a side airbag?
It is safe if you follow proper safety procedures. Always disconnect the negative battery terminal and wait at least 10-20 minutes to allow the airbag system's capacitors to discharge before unplugging any connectors. Consult your vehicle's service manual for specific instructions.
Why does my door armrest feel flat and hard?
This is caused by foam collapse. The polyurethane foam inside the armrest compresses over time due to constant pressure and heat. It loses its cellular structure and cannot bounce back. The only fix is to replace the old foam with new, higher-density automotive-grade foam.