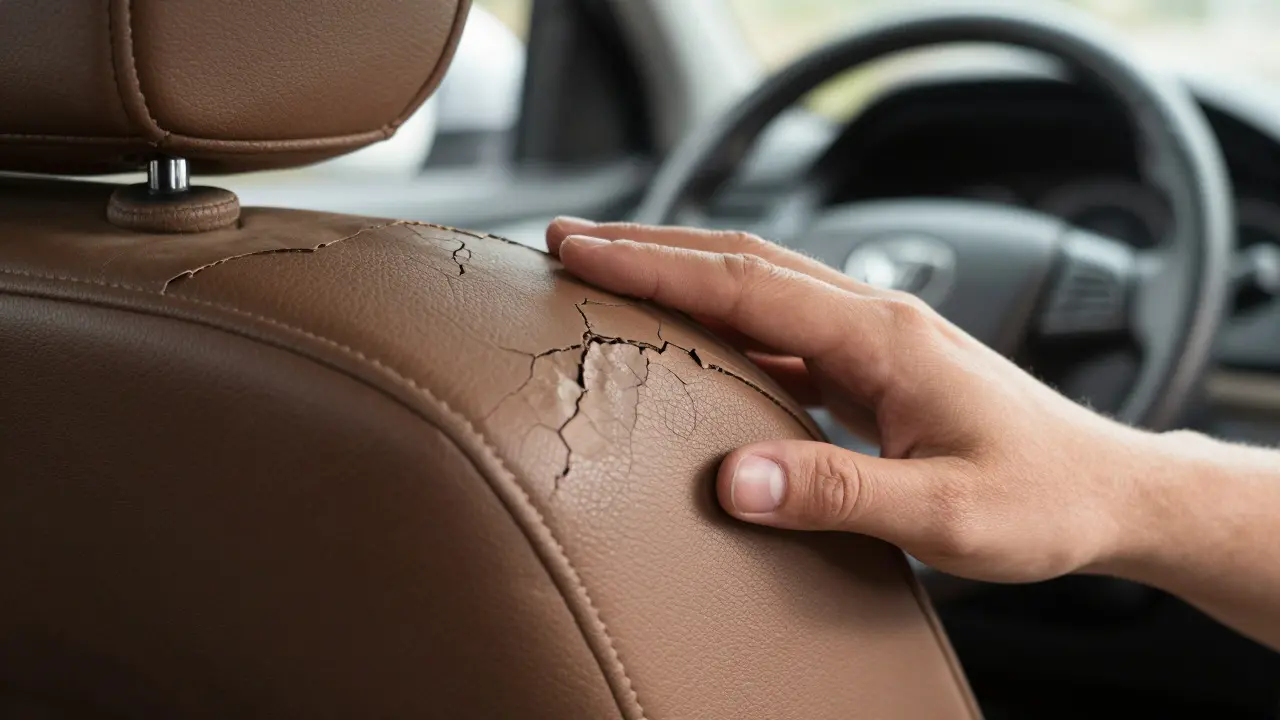
There is a specific moment when you slide into your driver's seat and the old, cracked leather peels slightly under your hand. It’s not just an aesthetic issue; it’s a signal that your vehicle’s comfort zone is degrading. For many car owners in Portland and across the Pacific Northwest, this is the tipping point where they decide to either sell the car for less or invest in a Leather Seat Re-Upholstering project to bring the interior back to life. This process isn't just about slapping on new skin. It is a complete car interior transformation that involves stripping, repairing, and re-stitching complex components to restore both function and value.
Why Choose Leather Over Fabric or Vinyl?
Before diving into the how-to, it helps to understand why we bother with leather at all. Unlike synthetic materials like vinyl, which can crack and fade within three to five years, genuine leather ages gracefully if maintained. However, when it does fail, the repair options are limited. You cannot simply patch a large tear in leather without it looking obvious. That is why full re-upholstering is often the only viable long-term solution for high-mileage vehicles.
The primary advantage of professional-grade leather upholstery is its durability and heat resistance. In summer months, leather seats stay cooler than dark fabric, though they do require conditioning. From a resale perspective, a well-executed leather interior can add between $500 and $1,500 to a used car’s value, depending on the make and model. If you are planning to keep your car for another five years, the investment usually pays off through extended usability and enhanced driving comfort.
The Anatomy of a Seat Upholstery Job
Understanding what actually happens during a re-upholstering job helps you ask the right questions when getting quotes. The process breaks down into four distinct phases:
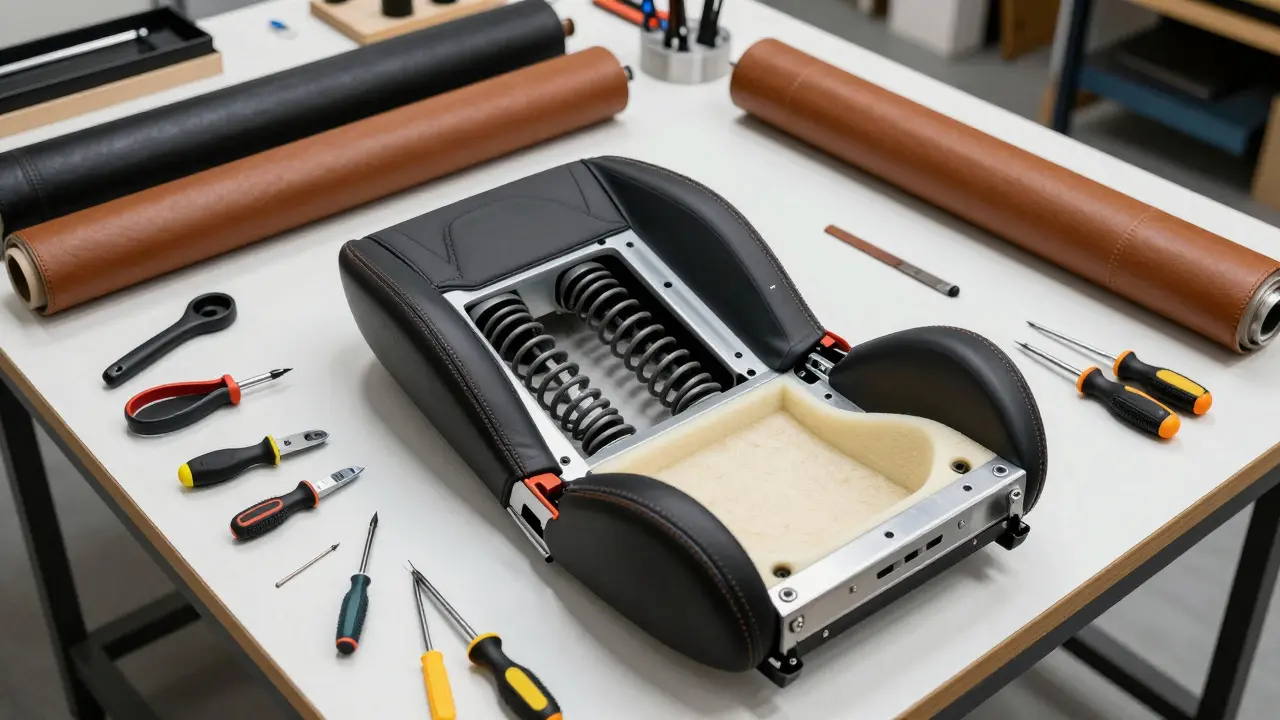
- Disassembly: Removing the seat from the vehicle, taking out the headrests, and separating the outer shell from the inner foam structure. This requires specific tools like trim removal tools and screwdrivers to avoid breaking plastic clips.
- Assessment and Repair: Inspecting the underlying foam for degradation. Old foam becomes hard and lumpy over time. Often, replacing the foam core is as important as replacing the leather itself. If the frame has rust or broken springs, these must be fixed before any new material is applied.
- Cutting and Stitching: This is the most labor-intensive part. Patterns are cut from the new leather, and each piece is stitched together. Modern shops use industrial sewing machines capable of handling thick hides, while DIYers might use heavy-duty domestic machines or hand-sew certain areas.
- Reassembly and Finishing: Putting the new cover back onto the frame, installing the headrests, and mounting the seat back into the car. Final touches include cleaning the surrounding carpet and checking electrical connections for heated or ventilated seats.
DIY vs. Professional: Making the Right Call
Should you try this yourself? It depends on your mechanical aptitude and the complexity of your seats. Simple bucket seats with basic stitching are manageable for a skilled hobbyist. However, if your car has power-adjustable seats, memory functions, or integrated airbags, the risk of damaging expensive electronic components rises significantly.
| Factor | DIY Approach | Professional Shop |
|---|---|---|
| Estimated Cost | $300 - $600 (materials) | $800 - $2,500+ (labor + materials) |
| Time Investment | 40 - 80 hours | 3 - 7 business days |
| Skill Level Required | Intermediate to Advanced | None required from owner |
| Risk of Damage | High (electronics, frames) | Low (warranty provided) |
| Material Quality Control | Variable (depends on source) | Consistent (commercial grade) |
When I helped a friend restore his 2012 BMW 3 Series, we initially considered doing it ourselves. We had the leather and the tools. But when we popped the seat open, we found that the tension wires for the side bolsters were snapped. Replacing those required specialized knowledge. We ended up paying a local shop in Portland to handle the structural repair, then did the final stitching ourselves. It was a hybrid approach that saved money but required patience.
Selecting the Right Materials
Not all leather is created equal. When sourcing materials, look for top-grain leather rather than split leather. Top-grain retains the natural grain pattern and is far more durable. Split leather is essentially the underside of the hide, coated with polyurethane to mimic the look of real leather. It feels different and wears out faster.
You also need to consider the lining. A good upholstery job uses a breathable mesh or cotton canvas as the backing layer. This prevents the leather from sticking to the foam and allows moisture to escape, which is crucial in humid climates like Oregon. Cheap jobs often skip this step, leading to mold growth or adhesive failure within two years.
For stitching, use bonded nylon thread. It is stronger than polyester and holds up better against friction. If your seats have perforations for ventilation, ensure the new leather matches the original hole pattern. Mismatched perforations look amateurish and can block airflow, reducing the effectiveness of climate control systems.
Cost Factors and Budgeting
Pricing for leather seat re-upholstering varies wildly based on several factors. Here is a realistic breakdown of what drives the price tag:
- Number of Seats: Front bucket seats are standard. Adding rear bench seats increases labor by 30-50% because they are harder to access and often have more complex shapes.
- Type of Leather: Standard cowhide is the baseline. Exotic skins like Nappa, Alcantara, or suede command a premium. Nappa leather, known for its softness, can cost 20-30% more than standard top-grain.
- Complexity of Design: Quilted patterns, contrast stitching, and multi-tone designs require more cutting and sewing time. Each additional color adds roughly $100-$200 to the total cost.
- Additional Repairs: If the foam needs replacing, expect to pay $50-$100 per seat for the material alone. Frame repairs can add another $150-$300.
A safe budget for a four-door sedan with front seats only is around $1,200 to $1,800. If you want the entire cabin done, including door panels and center console, double that estimate. Always ask for a written quote that itemizes labor and materials separately. This protects you if hidden issues arise during disassembly.

Maintenance Tips for Longevity
Once your seats are fresh, the work isn't done. Proper maintenance extends the life of your new upholstery. Use a pH-neutral leather cleaner every six months. Avoid silicone-based conditioners, as they can clog the pores of the leather and prevent it from breathing. Instead, opt for plant-based waxes or beeswax blends.
In winter, salt spray from roads can corrode the metal frames underneath the seats. Wipe down the seat rails after heavy rain or snow. Also, be mindful of UV exposure. If you park outside frequently, consider using a windshield sunshade to reduce direct sunlight on the driver's seat. UV rays break down collagen fibers in leather, leading to premature cracking.
Frequently Asked Questions
Can I re-upholster just one seat?
Yes, but matching the color and texture of the existing seats can be difficult. Most people choose to redo both front seats to ensure symmetry. If you only do one, expect a slight difference in wear and shade unless you find an exact match in the hide.
How long does the process take?
A professional shop typically takes 3 to 7 business days for front seats. This includes drying time for adhesives and curing time for any sealants. DIY projects can take several weekends depending on your pace and experience level.
Is it worth it for an older car?
If the car is structurally sound and you plan to drive it for at least three more years, yes. The comfort improvement is immediate. However, if the engine or transmission has major issues, prioritize mechanical repairs first. Upholstery is a cosmetic and comfort upgrade, not a mechanical fix.
What is the difference between leather and faux leather?
Genuine leather is animal hide that breathes and ages naturally. Faux leather, or vegan leather, is made from PVC or polyurethane. While cheaper upfront, faux leather tends to peel and crack after 3-5 years of heavy use. Genuine leather lasts much longer with proper care.
Do I need to replace the foam too?
Often, yes. If the original foam is compressed or has lost its shape, new leather will conform to the bad shape. Replacing the foam ensures the new seats feel plump and supportive. It adds to the cost but significantly improves comfort.