
When the Battery Light Comes On
You're driving down the highway, maybe just coming out of a rainstorm near the city limits, and suddenly that yellow icon shaped like a battery illuminates on your dashboard. Your mind races. Is this going to leave you stranded? Should you keep driving home, or is this an emergency stop? Most drivers panic and assume their vehicle battery is dead, but often the real culprit is further down the power chain. Understanding the difference between a dying battery and a failing charging system can save you a tow truck fee.
This situation requires a clear-headed assessment. If you are stuck on the side of the road, the goal isn't necessarily to rebuild the engine components right there on the asphalt. The priority is determining if a quick inspection points to something simple like a belt slip or a loose connection. Master mechanics emphasize that before swapping out expensive parts, you must rule out mechanical wear and tear first. A comprehensive on-site check covers three critical areas: the belt itself, the pulleys guiding it, and the electrical contacts feeding the system.
Understanding the Charging System Basics
To troubleshoot effectively, you need to know what you're looking at. Many people think the Battery is the sole power source that keeps a car running while the engine turns. That’s actually not true. The battery gets the engine started. Once the ignition fires, the job shifts to the Alternator is a high-output generator driven by the engine crankshaft that recharges the battery and powers electronics.. Without a functioning alternator, the vehicle runs solely on stored energy until the battery drains completely, leaving you stalling in traffic.
Inside the engine bay, the alternator is connected via rubber drive belts. In older cars, you might see multiple V-belts. In almost every modern vehicle built in the last two decades, you'll find a single Serpentine Belt is a multi-ribbed belt that drives several engine accessories simultaneously including the alternator, power steering, and air conditioning compressor.. This setup simplifies the layout but increases the stakes; if this one belt snaps or slips, everything stops working. Identifying the type of belt helps determine which maintenance checks apply to your specific vehicle model.
Inspecting the Serpentine Belt Condition
The physical belt is the first thing a mechanic grabs because it causes the most roadside failures. You don't need special tools for this initial visual pass. Open the hood and locate the belt wrapping around the bottom pulleys. Run your fingers along the ribs if the engine is cool and off-never touch a moving belt. Look specifically for three damage indicators that signal imminent failure.
- Glazing: A shiny, smooth surface on the ribs indicates slipping. Friction creates heat, melting the rubber. A glazed belt won't grip tight enough to charge the alternator.
- Cracks: Check the sides of the belt for dry rot lines. Small hairline cracks eventually turn into big splits that can snap while you drive.
- Wear Patterns: Modern ribbed belts wear flat rather than fraying. If the distinct ridges look flattened or squashed, the material is losing its ability to transmit torque.
If you see any of these issues, the alternator might still be fine, but the belt is causing the charging error. Replacing the belt is often cheaper and faster than replacing a good alternator.
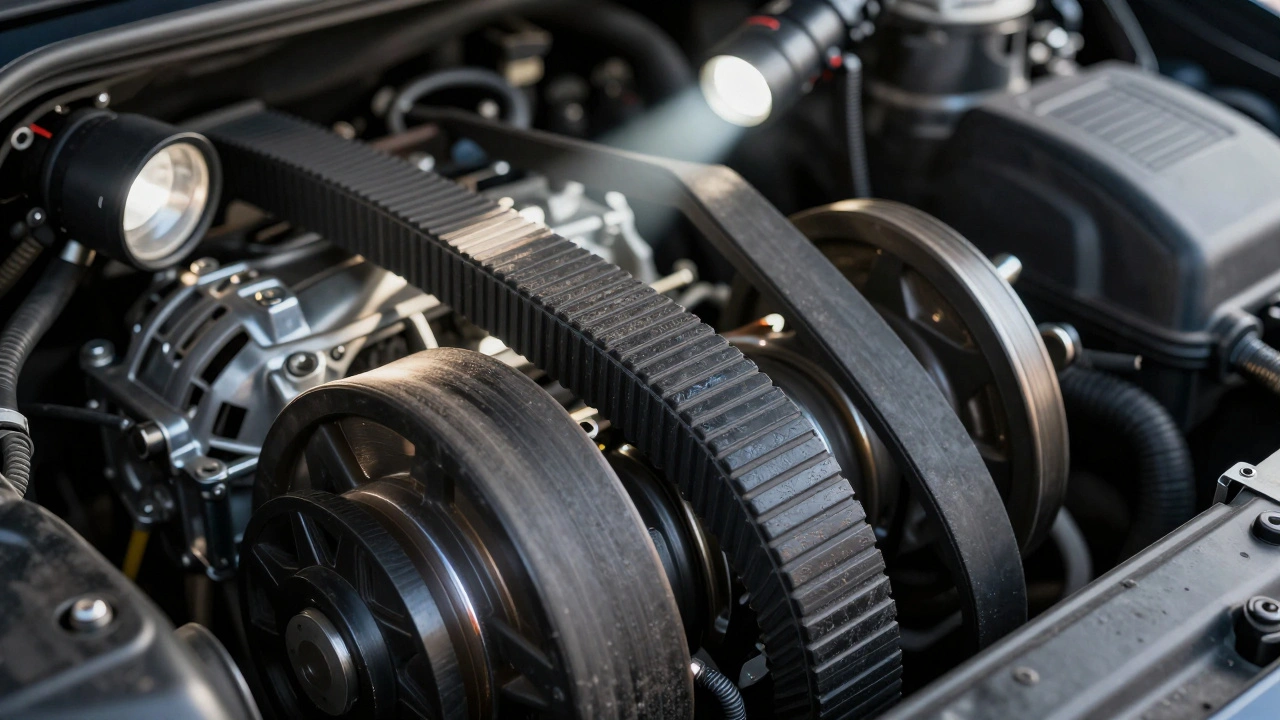
The Role of the Idler Pulley
A frequent point of confusion is noise coming from the belt area. Often, mechanics blame the alternator bearings immediately, but the Idler Pulley is a wheel mounted on the engine block designed to maintain proper tension and alignment for the serpentine belt. is usually the weak link. These pulleys spin freely to change the angle of the belt path. Over time, the bearing inside the idler pulley dries out.
To check this without removing the belt, try spinning the pulley with your hand. It should rotate silently. If you feel grinding or hear a whining sound, the pulley needs replacement. A noisy pulley creates resistance that slows down the alternator's RPM. This lack of speed means less electricity is generated, triggering the warning light. Ken Boyer, a master trainer at Garage Gurus, notes that inspecting the pulley function is essential because a worn pulley mimics alternator failure symptoms perfectly. Distinguishing this saves you from buying unnecessary heavy machinery.
Checking Electrical Connections
Sometimes the hardware works, but the signal is blocked. Electricity hates resistance. Corroded terminals act like bottlenecks. Grab a flashlight and inspect the wiring harness plugged into the back of the alternator. Specifically, you need to verify the ground connection, the power feed, and the remote sense wire. Clean metal means better conductivity. You might see green dust on the connectors-that's oxidation eating away the copper contact points.
| Component | Key Attributes | Failure Signs |
|---|---|---|
| Serpentine Belt | Ribs, Tension, Texture | Glazing, Cracks, Flattening |
| Idler Pulley | Spinning Resistance, Noise | Grinding Sounds, Stiff Spin |
| Electrical Terminals | Cleanliness, Tightness | Corrosion, Loose Fit, Burn Marks |
Loose mounting bolts can also cause vibration that rattles wires apart. Shake the alternator gently (while disconnected) to ensure the bracket holds firm. If the unit wobbles, the vibrations can fatigue internal diodes over time.
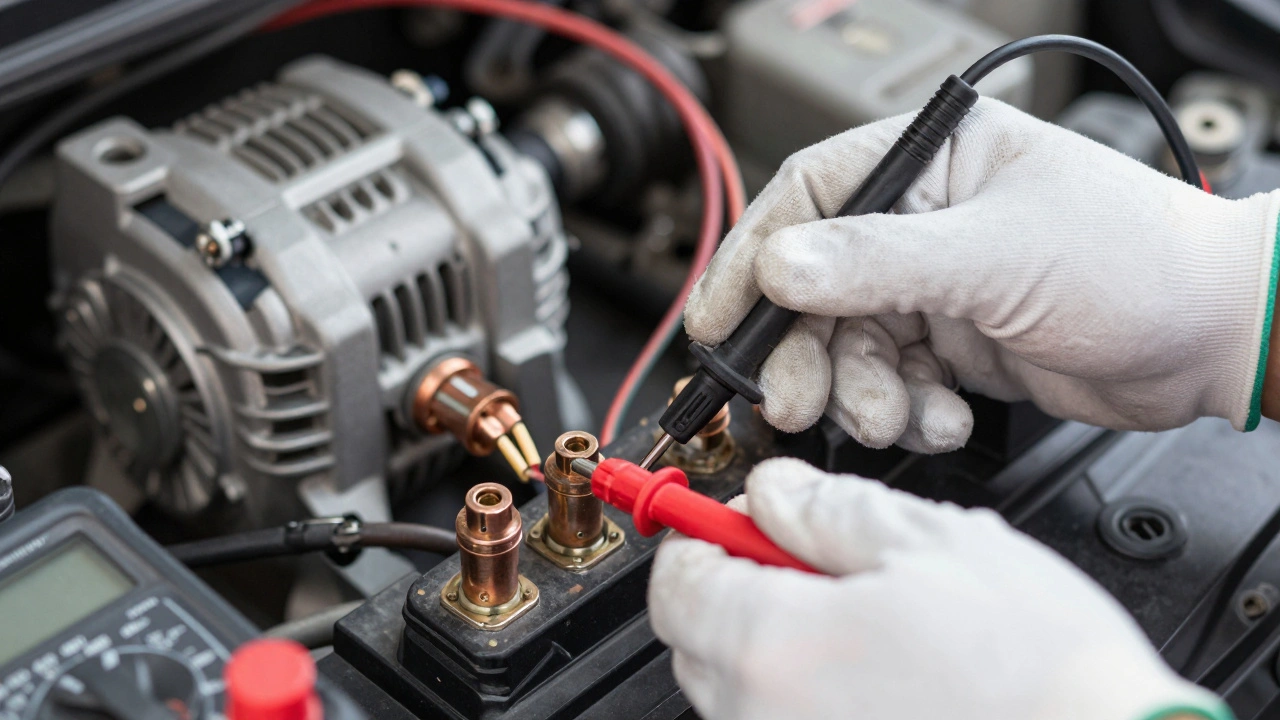
Testing Voltage with a Multimeter
Once the visual checks pass, you need hard data. A basic digital multimeter costs about $3 at hardware stores and tells you definitively if the system is producing power. Connect the red probe to the positive terminal and black to the negative on the battery. With the engine off, you should read around 12.6 volts. This is the resting battery health.
Start the engine and rev it to about 2,000 RPM. The reading should climb to between 13.8 and 14.4 volts. This confirms the alternator is actually generating current. If the number stays below 13.5, the alternator isn't putting out enough juice. If the voltage spikes above 15 volts, your voltage regulator is likely broken and may fry the battery. Turn off all accessories like headlights and fans during this test to get a baseline reading. Load tests provide a better picture of the system under stress, but this baseline check catches most common failures.
Safety and Installation Procedures
If you are confident enough to attempt a replacement roadside, safety comes before repair. Find shelter from the rain; wet hands plus exposed battery terminals equals dangerous sparks. Secure the vehicle on level ground with hazard lights active. The very first step in any alternator swap is disconnecting the battery cables to prevent short circuits. Never remove the old unit without knowing where the wires go, so take photos before unplugging anything.
When removing the belt, note the routing pattern. Trace the path around every pulley with your finger and memorize it. Some engines hide difficult bolts behind the alternator. Remove the rear bolts first, then the front ones, so gravity doesn't drop the unit prematurely. During installation, thread the new belt carefully. Do not pry the belt on with a screwdriver as this damages the rubber. Spin the engine over manually to ensure the belt sits in the grooves. Once installed, double-check routing with a flashlight before firing up the ignition.
Maintenance to Prevent Future Failures
Prevention beats roadside panic. AAA and AutoZone guidance suggests checking these components during regular oil changes. Keep electrical terminals sprayed with dielectric grease to stop corrosion buildup. Inspect belt tension annually; a loose belt slaps and wears quickly. Replacing the Vehicle Battery is an energy storage device that initiates engine cranking and stabilizes voltage. before it gets too old puts less strain on the alternator to recharge. Old batteries with sulfated plates force the alternator to work harder, reducing its lifespan. Simple preventative care extends the life of the entire charging ecosystem.
Can I drive with a bad alternator?
You can drive only short distances until the battery power depletes. Once the battery drains, the vehicle will stall unexpectedly. It is safer to pull over immediately and call for assistance if the light is flashing or voltage is low.
How much does an alternator check cost?
A standalone charging system test at a shop typically costs between $30 and $50. However, performing a basic visual inspection yourself is free and can identify cheap repairs like belt replacements.
Does the battery light mean the alternator is broken?
Not always. The light signals a charging issue which could be the alternator, but it is frequently caused by a loose serpentine belt, a bad idler pulley, or corroded connections.
Can a bad alternator kill my battery?
Yes. An alternator that produces unstable voltage or surges can permanently damage battery cells, shortening the life of the battery even if the alternator is replaced later.
How do I know if my belt is the problem?
Listen for a squealing noise that changes with engine speed. Visually check for glazing or cracks on the belt ribs. If the belt feels loose when pressed, it needs tightening or replacement.