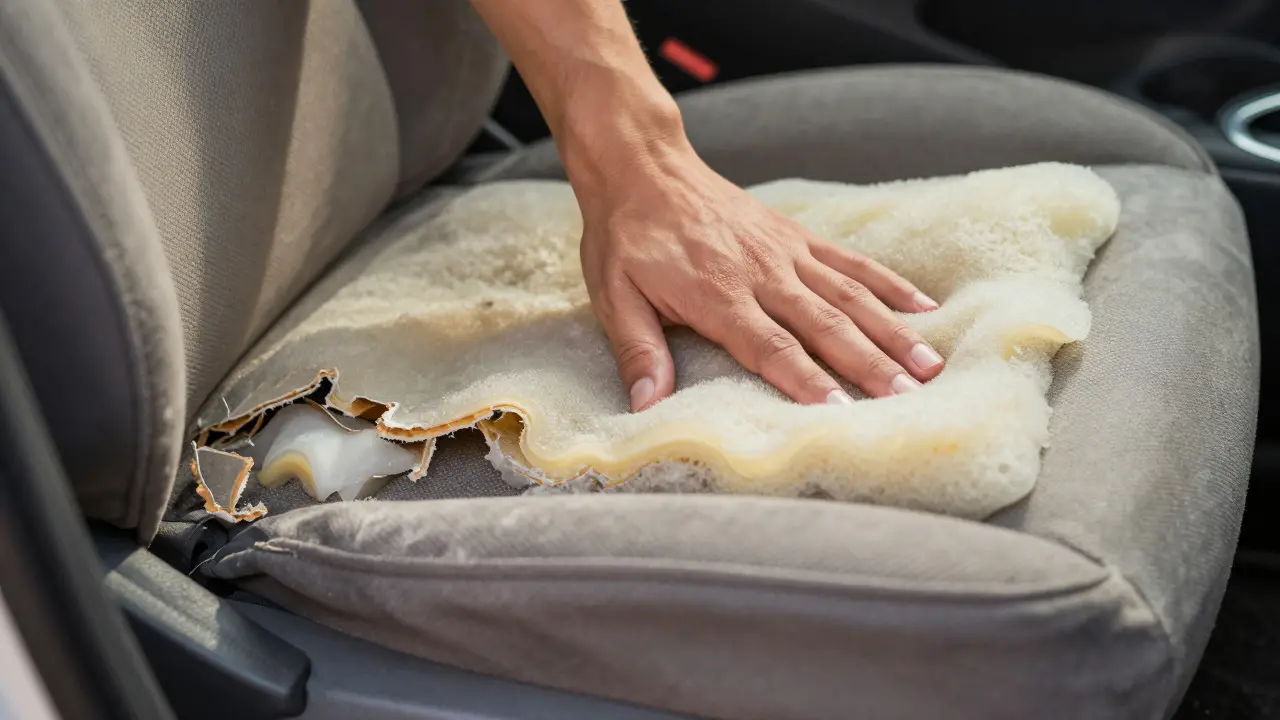
Your car’s seats used to feel like a cloud. Now they feel like sitting on a brick wrapped in leather. If you’ve been wincing every time you slide into the driver’s seat, it’s likely not your back-it’s the foam. The cushioning material inside your car seats has broken down, losing its shape and support. A seat foam rebuild is the most effective way to restore that original comfort without replacing the entire seat assembly.
Replacing just the foam costs a fraction of buying new seats or having them fully reupholstered. It also lets you keep the original look and feel of your vehicle while fixing the underlying structural issue. Whether you’re dealing with a sagging center cushion or a flattened bolster, this guide walks you through exactly how to identify the problem, choose the right materials, and execute a durable fix that lasts for years.
Why Your Seat Foam Fails
Car seat foam isn’t designed to last forever. Most manufacturers use polyurethane foam, which degrades over time due to heat, weight, and UV exposure. When the foam cells break down, the material loses its elasticity. Instead of bouncing back after you stand up, it stays compressed. This creates permanent indentations and reduces lumbar support.
The failure usually happens in three specific ways:
- Compression Set: The foam flattens permanently under the driver’s hip area. You can see a distinct dip in the center of the seat cushion.
- Cell Collapse: The internal structure crumbles, making the seat feel soft but unstable. It lacks the firmness needed to hold your posture.
- Tear or Splitting: In older vehicles, the foam may actually crack or split along stress lines, especially where the seat folds or bends.
If you press your thumb into the seat and it doesn’t spring back within two seconds, the foam is done. No amount of cleaning will fix this. You need new material.
Choosing the Right Replacement Foam
Not all foam is created equal. Using the wrong type is the number one reason DIY rebuilds fail within six months. You need to match the density and resilience of the original material, or better yet, upgrade slightly for improved longevity.
| Material Type | Density (PCF) | Best For | Lifespan Estimate |
|---|---|---|---|
| Standard Polyurethane | 1.8 - 2.5 | Budget repairs, low-mileage cars | 3-5 years |
| High-Density Polyurethane | 2.5 - 3.0 | Driver’s seat, daily commuters | 7-10 years |
| Polyether Foam | 2.5 - 3.5 | Long-term durability, heavy users | 10+ years |
| Memory Foam (Top Layer) | 4.0+ | Add-on comfort layer only | 5-7 years |
For a standard sedan or SUV, aim for a minimum density of 2.5 PCF (pounds per cubic foot). If you weigh over 200 pounds or drive long distances daily, go for 3.0 PCF. Avoid anything below 2.0 PCF; it will flatten again quickly. Polyether foam is more expensive but resists heat degradation better than standard polyurethane, making it ideal for hotter climates like parts of the Pacific Northwest during summer months.
You’ll typically need two layers: a high-density base layer for support and a softer top layer for comfort. Many successful rebuilds use a 3.0 PCF base with a 2.0 PCF comfort layer on top. This mimics the original factory construction while improving resilience.
Tools and Materials You Need
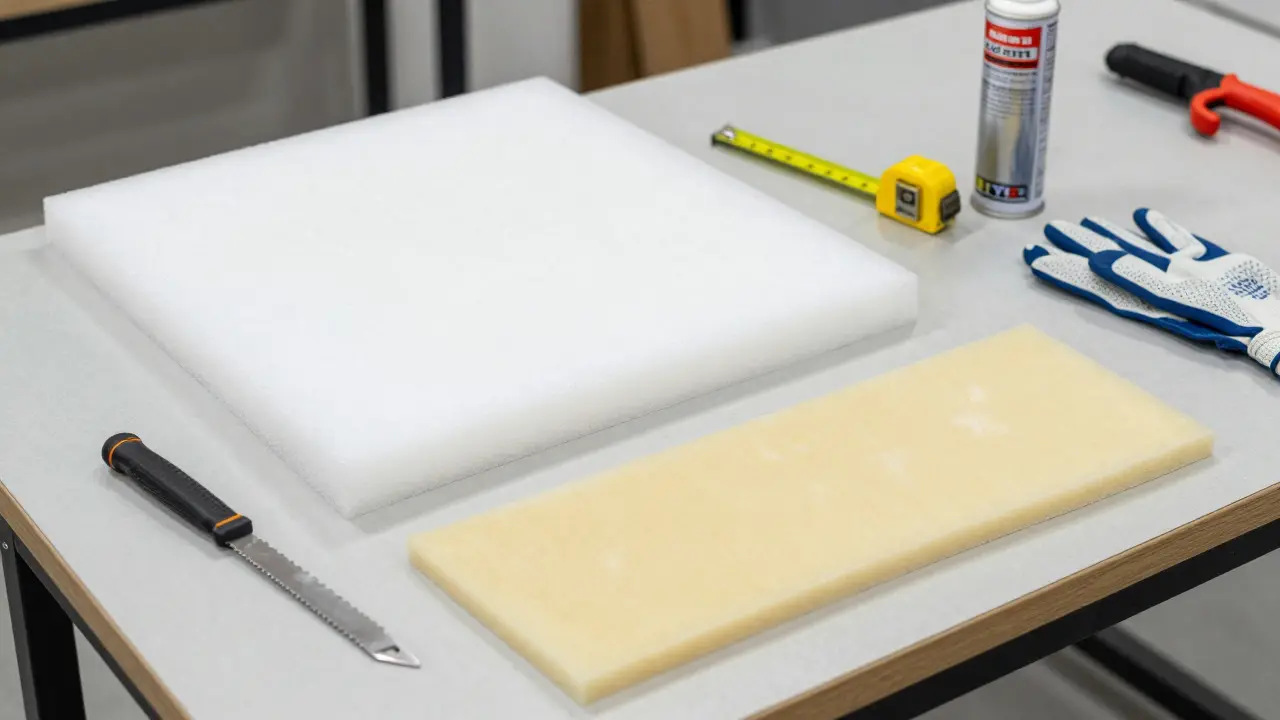
Before you start cutting, gather these essential items. Missing even one tool can turn a simple job into a frustrating mess.
- Foam Cutter: A serrated knife works, but a dedicated foam cutter gives cleaner edges. Avoid using a straight razor; it tends to tear the foam fibers.
- Measuring Tape and Ruler: Precision matters here. Measure twice, cut once.
- Spray Adhesive: Use a high-temperature resistant automotive spray adhesive. Standard office glue will melt or peel off in the sun.
- Heat Gun or Hairdryer: Useful for loosening old foam tabs or stretching fabric if you’re reusing the cover.
- Zip Ties or Binder Clips: To hold the new foam in place while the adhesive dries.
- Protective Gloves and Mask: Foam dust is irritating to lungs and skin.
If you’re keeping the original seat cover, inspect it for tears. If the fabric is worn out, consider ordering a replacement cover from an upholstery shop. It’s often cheaper to buy a new cover than to patch an old one repeatedly.
Step-by-Step Rebuild Process
This process assumes you’re working on a single seat cushion. Backrests follow similar logic but require more care with stitching points.
- Remove the Seat: Disconnect the battery first to avoid airbag triggers. Remove the bolts holding the seat to the floor. Label any wiring connectors before unplugging them.
- Strip the Cover: Unclip the plastic trim pieces and unzip or unbutton the fabric cover. Take photos as you go-these will be your blueprint for reassembly. Remove the old foam carefully, noting how it was positioned relative to the frame.
- Clean the Frame: Wipe down the metal or plastic frame with rubbing alcohol. Remove any leftover adhesive residue. Ensure the surface is dry before applying new foam.
- Cut the New Foam: Lay the old foam on top of the new sheet as a template. Trace the outline and cut. Leave about half an inch extra on all sides for trimming later. Cut the base layer and comfort layer separately.
- Apply Adhesive: Spray a thin, even coat of adhesive on the frame and the bottom of the base foam layer. Press firmly and hold for 30 seconds. Use zip ties to secure the foam to the frame at key anchor points.
- Add the Top Layer: Apply adhesive between the base and comfort layers. Align them carefully. Smooth out any bubbles or wrinkles. Let the adhesive cure for at least four hours before moving the seat.
- Reinstall the Cover: Stretch the fabric cover back over the new foam. Start from the front and work backward. Use binder clips to hold the fabric taut while you staple or sew the edges. If the cover is tight, use a heat gun gently to relax the fabric.
- Reassemble and Test: Put the seat back in the car. Sit on it. Check for even pressure distribution. Adjust any loose fabric or misaligned foam sections immediately.
Don’t rush the drying time. Rushing leads to shifting foam, which causes lumps and uneven wear. Patience here saves you from redoing the job next month.
Common Mistakes to Avoid
Even experienced DIYers make these errors. Watch out for them:
- Using Too Much Adhesive: Excess glue seeps through the fabric, creating stiff spots. Use a light, even coat.
- Ignoring Frame Damage: If the metal frame is bent or rusted, fix it before adding foam. Otherwise, the new cushion will sag unevenly.
- Skipping the Template: Cutting freehand leads to poor fit. Always use the old foam as a guide.
- Forgetting Airbag Safety: Never work on a seat with the airbag deployed or disconnected without proper precautions. Follow your vehicle’s service manual.
- Choosing Low-Density Foam: Cheap foam feels good for a week, then fails. Invest in quality material.
When to Hire a Professional
A DIY rebuild is cost-effective for most sedans and trucks. However, consider hiring a professional upholsterer if:
- Your car has complex power-adjustable seats with multiple motors and sensors.
- The seat covers are rare or difficult to replace.
- You want a custom look, such as adding memory foam or changing the color.
- You lack the tools or workspace to safely remove and reinstall the seat.
Professional labor typically ranges from $150 to $300 per seat, plus materials. While more expensive upfront, a pro ensures perfect alignment and warranty coverage on their workmanship.
Maintenance Tips for Longevity
Once your seat foam is rebuilt, protect your investment with simple habits:
- Use Seat Covers: Even simple neoprene covers shield the foam from sweat, oil, and direct sunlight.
- Avoid Direct Sunlight: Park in shade when possible. UV rays accelerate foam breakdown.
- Rotate Seating Position: If you always sit in the same spot, try shifting slightly left or right occasionally to distribute wear.
- Clean Regularly: Vacuum crumbs and debris that can abrade the fabric and compress the foam unevenly.
With proper care, a high-quality foam rebuild can last seven to ten years, giving you nearly a decade of restored comfort.
Can I use regular household foam for my car seat?
No. Household foam is too soft and breaks down quickly under body heat and weight. You need automotive-grade polyurethane or polyether foam with a density of at least 2.5 PCF for lasting support.
How much does it cost to rebuild car seat foam?
DIY costs range from $50 to $100 per seat for materials. Professional services typically charge $150 to $300 per seat, depending on complexity and location. Prices may vary by region and vehicle type.
Will rebuilding the foam affect the airbag system?
Not if done correctly. The airbag module is usually mounted on the side or center of the seat frame, not embedded in the foam. Just ensure you don’t block any sensor wires or damage the mounting points during disassembly.
What is the best foam density for a driver’s seat?
Aim for 3.0 PCF high-density polyurethane or polyether foam. This provides firm support for long drives and resists compression set better than lower densities.
How long does the adhesive take to dry completely?
Most automotive spray adhesives tack-free in 10 minutes but require 24 hours for full bond strength. Avoid sitting on the seat for at least four hours to prevent shifting.