
Your transmission isn't just a box of gears; it's a hydraulic system controlled by a brain. When that brain-the Transmission Control Module (TCM)-starts sending mixed signals, your car might hesitate, slip, or refuse to shift. Most DIYers jump straight to swapping parts, but the real issue usually lies in the data flow between the computer, the solenoids, and the hydraulic pressure. If you want to fix this right, you need to stop guessing and start measuring.
Diagnosing a Transmission Control Module is the electronic unit that manages shift timing, torque converter lockup, and valve body operation based on sensor input. It doesn't work alone. It relies on feedback from speed sensors and commands output through Solenoids, which are essentially electrically operated valves that direct Transmission Fluid (ATF) to specific clutch packs. If one of these links breaks, the TCM reacts with fault codes, but those codes often point to symptoms, not root causes. That’s why combining electrical testing with mechanical pressure verification is the gold standard for accurate diagnosis.
Reading the TCM: Beyond Basic Fault Codes
Before you touch a wrench, you need to understand what the TCM is actually saying. Modern OBD-II scanners can read generic powertrain codes, but they often miss the nuance of transmission-specific issues. You need a dedicated scan tool or a high-end bidirectional scanner to access live data and manufacturer-specific codes. A code like P0750 (Shift Solenoid A Malfunction) tells you the circuit has an open or short condition, but it doesn’t tell you if the solenoid itself is stuck, the wiring is chafed, or the TCM driver is dead.
The key here is correlation. Look at the live data parameters while driving or on a lift. Watch the Vehicle Speed Sensor (VSS) and Turbine Speed Sensor readings. If the VSS shows 30 mph but the Turbine Speed fluctuates wildly during a steady throttle application, you have a slipping clutch or a pressure problem. The TCM will try to compensate by holding the gear longer or shifting into limp mode. This behavior gives you clues about whether the issue is electrical (solenoid response time) or hydraulic (pressure loss).
- P0700 Series: General transmission control system malfunction. Often a gateway error indicating deeper issues elsewhere.
- P0715-P0746: Speed sensor circuits. Check for damaged harnesses near the transmission bell housing.
- P0750-P0789: Solenoid circuit faults. These are your primary targets for electrical testing.
Testing Solenoids: Resistance vs. Functionality
Many technicians stop at checking resistance with a multimeter, assuming that if the coil reads within spec, the part is good. This is a common trap. A solenoid can have perfect resistance but still be mechanically stuck or magnetically weak. To truly diagnose a solenoid, you need to test its functionality under load.
First, perform a static resistance check. Disconnect the connector and measure across the terminals. Typical values range from 5 to 20 ohms, depending on the vehicle. If you get infinite resistance (open circuit), the coil is broken. If it’s below 5 ohms, you might have a short. But again, this only tells half the story. For a dynamic test, use a 12-volt battery and a resistor (around 10-20 ohms) in series to limit current. Apply power to the disconnected solenoid. You should hear a distinct click. If it clicks weakly or not at all, the plunger is likely sticking due to debris or internal wear. Some advanced tools allow you to pulse the solenoid rapidly to check for consistent actuation, which mimics how the TCM drives them during rapid shifts.
| Test Type | Expected Result | Fault Indication |
|---|---|---|
| Static Resistance | 5-20 Ohms (varies by model) | Open/Short Circuit |
| Visual Inspection | Clean, no corrosion | Contamination causing sticking |
| Dynamic Actuation | Sharp, consistent click at 12V | Mechanical binding or weak magnet |
| Wiring Continuity | <1 Ohm drop | Chafed harness or bad connector |
Fluid Pressure Testing: The Mechanical Truth
If the solenoids are clicking and the wiring is clean, the problem is almost certainly hydraulic. This is where Fluid Pressure testing comes in. You cannot diagnose a slipping clutch or a failing pump without knowing the actual line pressure inside the transmission. Manufacturers provide pressure charts in their service manuals, specifying the expected PSI (or Bar) for each gear at idle and at specified RPMs.
To perform this test, you need a transmission pressure gauge kit. Locate the pressure test ports on the valve body or transmission case. Screw in the gauge, ensuring the threads are clean to avoid contaminating the fluid. Start the engine and let it warm up to operating temperature-cold ATF is thicker and will give false high readings. With the brake applied, check the pressure in Park and Neutral. Then, move through the gears (D, 2, L) and record the pressure at idle and at 2,000 RPM.
Compare your numbers to the factory specs. Low pressure across all gears suggests a worn pump or a clogged filter. Low pressure in only one gear points to a failed clutch pack seal or a leaking piston. High pressure can indicate a restricted valve or a stuck regulator. Remember, Valve Body components are precision-machined brass parts. Even a small piece of metal debris can jam a spool valve, leading to erratic pressure changes that mimic electrical faults.
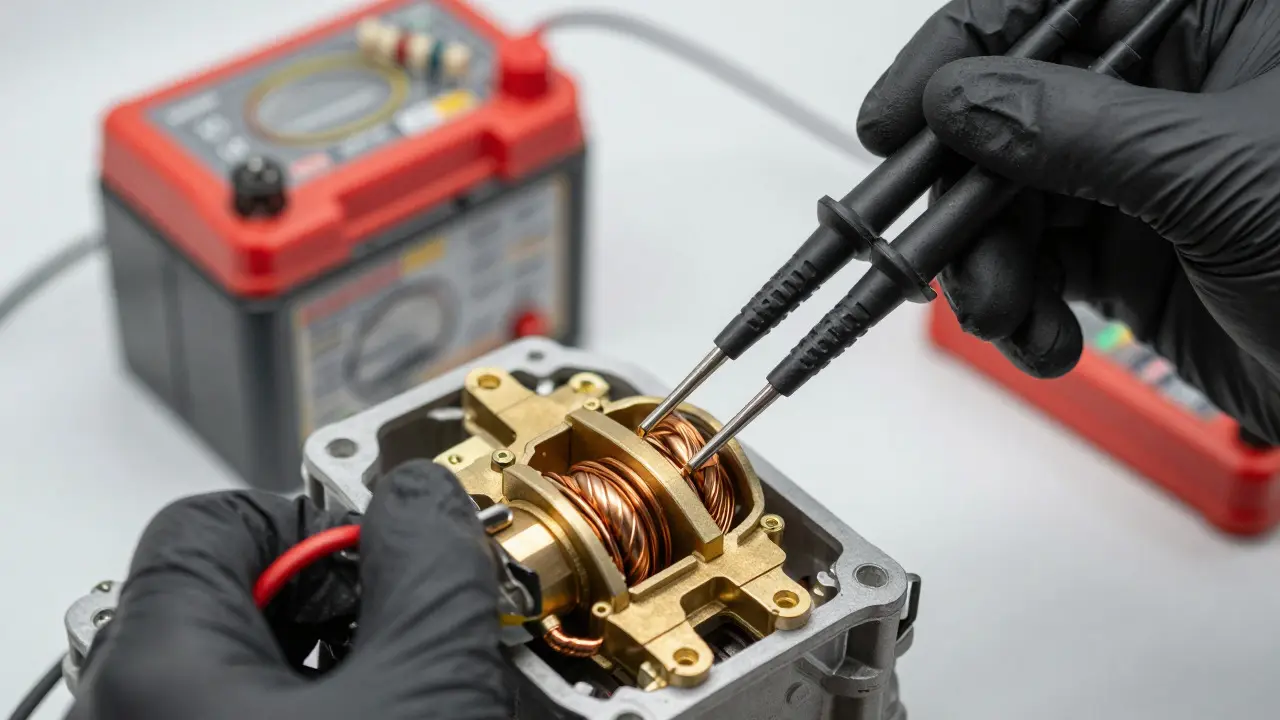
Correlating Electrical and Hydraulic Data
This is where the real diagnostic skill lies. You must cross-reference your electrical findings with your hydraulic results. Imagine you have a code for Shift Solenoid B, and the resistance checks out. You test the solenoid dynamically, and it clicks fine. But when you test fluid pressure in 2nd gear, it’s 40% lower than spec. What does this mean? It means the solenoid is opening, but it’s not delivering enough fluid. Why? Perhaps the valve body passage behind the solenoid is partially blocked, or the clutch pack itself is wearing down, allowing fluid to bypass the friction plates.
Conversely, if the pressure is perfect but the car slips, look at the electrical side again. Maybe the solenoid is opening too slowly because the TCM is limiting current due to a perceived voltage drop, or perhaps the Torque Converter Clutch (TCC) solenoid is modulating incorrectly, causing the converter to unlock prematurely. In this scenario, the hydraulic system is healthy, but the electronic command is wrong. This is why relying on just one type of test leads to expensive mistakes.
Common Pitfalls and How to Avoid Them
One of the biggest mistakes in transmission diagnosis is ignoring the fluid condition. Before doing any complex testing, check the ATF level and color. Burnt-smelling, dark brown fluid indicates heat damage and potential internal failure. If the fluid is low, air can enter the hydraulic lines, causing spongy pressure readings and erratic solenoid behavior. Always top off the fluid to the correct level before pressure testing.
Another pitfall is assuming the TCM is faulty because everything else seems fine. The TCM is rarely the first component to fail. It’s a robust computer designed to handle harsh environments. More often, the issue is upstream (sensors) or downstream (solenoids/pump). Only replace the TCM after you’ve verified that all inputs and outputs are functioning correctly. Reprogramming or relearning the adaptive values is also crucial after replacing any major component. Many modern transmissions store shift quality data in the TCM memory. If you replace a solenoid or the valve body, the old adaptive data might cause poor shifting until the system resets.

Step-by-Step Diagnostic Workflow
- Scan and Record: Use a capable scanner to record live data during a road test. Note any hesitation, slipping, or hard shifts. Save the data file.
- Inspect Wiring: Visually inspect the transmission harness for chafing, especially near moving suspension components or exhaust heat shields. Check connectors for moisture or corrosion.
- Test Solenoids: Perform static resistance checks on all solenoids. Follow up with dynamic actuation tests using a 12V source and current limiter.
- Check Fluid: Verify ATF level, color, and smell. Replace fluid if it appears burnt or contaminated with metal particles.
- Pressure Test: Install gauges and take readings at idle and 2,000 RPM for each gear. Compare against OEM specifications.
- Analyze Correlation: Match the pressure results with the electrical behavior. Identify if the fault is in the supply (pump/filter), distribution (valve body/solenoids), or consumption (clutch packs/bands).
- Verify Fix: After repairs, clear codes and perform a road test to ensure adaptive learning occurs and symptoms are resolved.
Frequently Asked Questions
Can I test transmission solenoids without removing them?
Yes, for basic resistance checks, you can often back-probe the connector pins with a multimeter. However, for dynamic actuation tests, it is safer and more accurate to unplug the connector and apply power directly to the solenoid terminals. This isolates the component from the TCM and wiring harness, giving you a true reading of the solenoid's physical state.
What is a normal transmission fluid pressure range?
There is no single universal number, as it varies significantly by vehicle make, model, and gear. Typically, line pressures range from 30 PSI to 150 PSI depending on the load and gear selected. Always refer to the specific service manual for your vehicle. Generally, idle pressures are lower (around 30-50 PSI) while wide-open throttle pressures are higher (80-150 PSI).
Does a bad TCM always throw a fault code?
Not always. While most electrical faults trigger codes, some intermittent issues or minor performance degradations might not set a permanent code. However, the TCM may enter a "limp mode" or default strategy without storing a hard code. This is why monitoring live data and observing driving behavior is essential, even when the dashboard light is off.
How do I know if the valve body needs cleaning or replacement?
If fluid pressure is inconsistent or erratic despite good solenoids and fresh fluid, the valve body is likely the culprit. Signs include metal shavings in the filter, sticking spool valves, or worn bores. Cleaning can resolve debris-related issues, but if the internal passages are scored or the seals are perished, replacement is necessary. Ultrasonic cleaning is effective for removing varnish buildup.
Is it worth repairing a used transmission with multiple solenoid failures?
It depends on the cost. If multiple solenoids have failed, it suggests a systemic issue like contamination or excessive heat, which may have damaged other components like clutches or the pump. Replacing just the solenoids might be a temporary fix. Evaluate the total cost of parts and labor versus the value of the vehicle. If the repair exceeds 50-60% of the vehicle's value, a rebuilt unit or replacement might be more economical in the long run.